Oh, darn! I set the wrong ISO on the camera and my image came out a bit too grainy! Darn it, I over exposed or underexposed my picture and my butterfly took off! Oh, man! The color is off! My image is, well, boring!! ARGH!!! Cuss. Swear. Rant. Ok, back to reality.
We’ve all had these problems and we have a choice we can make – hit the delete key or we can actually try something new to rescue it or give an image new life. Please bear in mind I am NOT a professional photographer and my ideas of “rescuing” an image might not play as well in the realm of professional photography. I am your average “Joe” who’s been shooting pictures since way back in the day when Kodak Instamatic cameras were the norm for the casual photographer and enjoying what comes of it – even if unsuccessful the first time around. Most of my work currently is of a documentary type since I am a wildlife watcher and want to record what I see. I'm trying to learn to take the curve around to combine what I see and make images that are pleasing to others. I have a great deal still to learn, but in the meantime, I am enjoying some digital play.
I left my early days with that old Kodak to finally venture into the world of digital photography leaving the world of film cameras forever behind when I purchased my first digital SLR in 2004 – a Canon Rebel 6.1 megapixel. I had spent quite a bit of time seeking my new “side arm” and I did consult with a pro photographer for insight. Bear in mind that this blog is geared not only to the dSLRs but any digital camera. No matter what, we have all suffered through some blunders – accidentally forgetting to change settings resulting in under or over exposed images or those that were too noisy or blurry. Some shots I just didn’t have the heart to delete – they were still a special memory for me and I started to learn about some of the various programs and plug-ins one could use to play with the images. Whether they are your best shots you want to manipulate to give a different feeling to, or in my case, taking some otherwise “documentary” or poor quality images and making them a bit more aesthetically pleasing or perhaps rescuing them all together, digital manipulation might be the answer.
There are several programs or plug-ins out there that can be either bought and downloaded or are free to download and use. For me, free is best. Who doesn’t like free? But, some of these programs or plugins you do have to pay for. So, for the purpose of this article, I thought I would introduce a few of these options I’ve become familiar with and hope that perhaps others might add to this discussion and help expand this topic and library of fun applications.
My post-processing is usually done within the Canon software that came with my camera or after I convert my RAW images to a format my old Photoshop Elements 2.0 can handle. I’ll give the usual corrections a run through - compensating for minor over or under exposures and color/contrast corrections. However, sometimes no matter what, I might still have a picture that just doesn’t quite shine, even to my non-professional eyes.
Now, what to do?
I had one shot I really liked and didn’t have the heart to just delete it. It was not your standard image taken with a telephoto lens but a combination of camera body and a Swarovski birding scope (a method called “digiscoping”). The resulting series of images of this immature great blue heron hiding in the reeds came out less than spectacular. The image is soft and very grainy due to the high ISO I needed this day and due to the fact that I was still learning how to take pictures via this method. However, I knew I’d never get this shot again.
Pretty yucky looking, right? Well, enter a plugin from Redfield called Fractalius. I was introduced to this downloadable, although not free, plugin through the artists at RedBubble. This plugin does work with my old Photoshop Elements 2.0, which generally is another hurdle I must leap over since PSE 2.0 is VERY OLD but all I have. I opened the image in PSE after downloading the Fractalius plug-in ($49.99 charge), did some clean up removing some of the reeds that cross the bird’s bill through cloning them out and sharpened the image as best as I could. Then, I ran the image through the Fractalius filter using the “Glo 100” choice. This is what resulted.
It’s certainly a far cry from the original version and I called this new image “Night Heron” because it gave me the impression of a bird hunkered down for the evening with the moonlight splashing over him. I can expand my visual picture in my mind thinking the moon is full and shining high off to the left. I did share this picture with some pro bird photographers and got some nice feedback on it as well as a few suggestions to tweak it a bit for further enhancement.
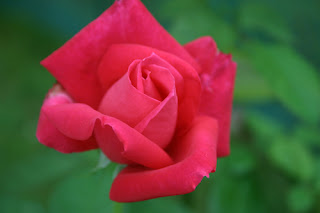
 Here’s another example of a rose photo taken at a friend’s house. It’s a beautiful image as is, although I am a bit miffed I clipped the upper petal… and below that is what it became after running it through Fractalius.
I did so some additional clean up removing some stray lines and blending/blurring some of the edges I didn’t like but I did get some nice comments on this one as well.
A documentary image of a captive Barred Owl. Again, this could be taken as pretty boring. The following images are made by using the black and white drawing selection and the Glo 100 selection.
Hum... what to do with this one?
Let’s try Fotosketcher!!
After running this image through this free downloadable program, I ran the image through using the “oil painting” choice and selected to add a canvas texture to it as well as heavier brushstrokes. Beside the full image is a detail crop showing the brush strokes and texture effect.
When I visited a local craft store to get a price on matting and framing this image, a pro photographer was also waiting at the counter. She couldn’t believe this was a digitally post processed image and raved about how beautiful it turned out. Needless to say, I was beaming when I left there!
Fotosketcher has several effects from pencil sketches to watercolor effects or even adding frames and canvas like textures. And, it's a free downloadable program that will work with my old PSE 2.0.
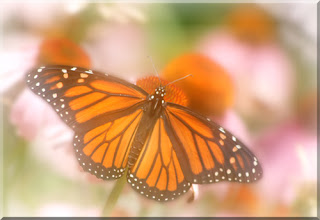
How about a third choice for unusual effects? I recently was introduced Optikvervelabs by Suzanne Williams after seeing an image she turned into a spectacular black and white. I took one of my “documentary” images of a monarch butterfly and ran it through several of the choices available. These are just at the tip of the iceburg! There are many more options you can try!

Here's my favorite which I hope to turn into a greeting card. This one was done in layers. I took the original butterfly image, duplicated the image, turned both into layers, and did a gaussian blur on the lower layer. The sharp layer required me to delete everything around the butterfly letting the blurry lower layer show through. I flatted the image and then ran it through the "Dreamy" selection and this is what came of it. Not too shabby.
To sum up, sometimes those less than stellar images can sometimes end up pretty cool after doing some digital alterations or manipulations using some of those programs and plugins out there. Most of all, it's about having fun, creating, and enjoying what results!


WOW ... I'm impress, looking forward to MORE.
ReplyDeleteVery informative and helpful. Thank you!
ReplyDeleteThank You! Great info!
ReplyDeleteWell done Donna! Great exploring and wonderful of you to share and inspire the rest of us!
ReplyDeleteGreat start, Donna! Plug-ins are certainly lots of fun and can rescue images you just can't part with. Looking forward to your next post.
ReplyDelete